Showing posts with label Party. Show all posts

Saturday, 10 May 2014

Frozen Party: Glass bottle favours

Firstly, my apologies I have been a blog deserter for favour of quick updates on my facebook page and completely neglected my updates. Somehow I still haven't added a party round up for the TMNT party J had back in November let alone Christmas - must try harder!

I am brought back here today because I have been planning Miss L's June birthday :) She wants the 'hot trend' of the moment: A Disney Frozen Party as a theme.

Firstly ... Do you know how hard it is just to buy snowflake related items in April/May?

The Disney store itself seems ill prepared for this sudden run away merchandising success, our local shop sells out of anything Elsa related before it even makes it to the shop floor, and anything from a certain auction site is priced high due to supply and demand. So I will be making everything from scratch in a largely bluey/white theme. The only saving grace is that we have managed to get our hands on one of the very elusive dresses, so at least I won't be needing my sewing machine this time around :)


Obviously I can't share too many party details yet as I'd hate to spoil the surprise for any of the attendees, but I can share this one: Glass bottle favors for the Party bags.


OK, so this isn't going to be some big turorial of a post, because if you know how to pour small things into glass bottles you are pretty much sorted, you just need to decide what to fill it with.


Firstly I tried, faux pearls, silver beads, glitter and tiny snowflake confetti, the idea being that the girls could use them as ornaments, and this one is certainly going on our tree this year.


I did ultimately shelve this idea for the party thou, as I was worried that some of the 3-4 year olds might accidentally ingest the contents. However this probably wouldn't be an issue for older party goers or if you included a safety tag/label.


This brought me to my next bright idea: edible contents. Here I've used Bubble gum millions - but any theme coloured tiny sweet or sherbert would do. I've added a paper punch snowflake and gem to keep it in the Frozen theme.

Other ideas that would work well might be just glitter, beads, feathers, or even make a melted snowman: (use firmo to make a tiny carrot nose, twigs and coal lumps and fill the bottle with water so they float). Good luck, and I hope this gives you yet another idea in your hunt for D.I.Y party perfection.


ps- apologies for the awful photo quality for some reason I can't photograph these in good light today!

Monday, 3 June 2013

MLP Party: Rainbow Dash Party Invites

My little Pony themed Invites for a paper crafter are a little tricky .... Do you attempt to cut out a whole pony? Do you go for a general girlie invite and add a pony at the end? Cutie Marks? Or just give in and print something?


As those of you following on Facebook will have seen I eventually went down the Rainbow route. In this case it was for Rainbow Dash the pony, but these could easily be used for a generic Rainbow Party.
 

Thursday, 16 May 2013

MLP Party: How to enlarge an image by hand for a Party 'Pin the Tail on the ...'

Planning a party? Really want a 'pin-the-tail' game and can't find the right one to fit your theme? No problem, just scale up an image and you can make your own! In fact this technique has a number of applications and will help you to copy or enlarge any image by hand. Great for cards to send into kids TV channels, posters, face-in-hole photo boards and even full scale wall murals :D


What you'll need:
- An image to copy
- A large sheet of paper (eg-A2)
- A pencil
- A good eraser
- A ruler
- Pencils/Paint/Felt tips


Firstly you need to find a good colour image of the character you want to use. Consider which item or part of them you want your guests to pin to the background image; for example; for a pony it might be the tail, for a clown a nose, etc etc. Make sure the position of this is prominent in the photo - we are not going to draw it but it helps if you can clearly see the object should be.

Monday, 26 November 2012

Super Hero Party: The finished result!

It's always nice when a plan comes together. Weeks of research on pinterest, brainstorming, cutting, gluing and baking finally came together. This time for my son's 4th Birthday Party. Amazingly this is the first children's party where I didn't feel rushed at the end, no sobbing into the regal icing, I even had time to go back and try ideas shelved as 'if I get time I might try that' - all helped by a few late nighters of course.


When we first started party planning my son quite liked Spiderman (you may remember the mask post back in August) then he quickly discovered other animated series the Super Hero Squad Show, X-men and the Avengers and so the party evolved into a more general 'Super Heros' party. I tried to represent all of his favourite characters in the food and party items: Hulk Jellies, Iron-man Biscuits, Captain America Cupcakes, Wolverine Cake, Thor's Cheese Hammers & Spiderman Invites ... we even had a telephone booth to change in....

Thursday, 15 November 2012

Super hero party: Iron Man Biscuit Cookies

There are likely to be quite a few super hero party related posts soon, as for the past few weeks I've had my head down creating and baking for my Son's themed Birthday this Saturday.
 
Firstly here is a last minute idea of mine: Iron Man's hand biscuits (I'm British and just can't bring myself to call anything that isn't soft and chewy a 'cookie'). They are baked with coloured dough so they look effective without needing a rainbow of regal icing or a steady hand for royal icing flooding. Althou, if you want a quick version of these biscuits, simple make the red dough and then cut grey and white regal icing into circles to stick on afterwards. [Read more, for the receipe]


Tuesday, 23 October 2012

Minnie Mouse Party

So sorry, this post appears to be 6 months late... As my son's birthday is fast approaching it occurred to me that on the bottom of the 'to be blogged' pile was my daughter's Minnie Mouse Party from back in June!
 
As it was the Jubilee we ended up having two parties in one weekend, and I have to admit that despite lots of early planning this one felt a little rushed, but it came together in the end and little lady had a great day. Click read more to see the full details...


Sunday, 5 August 2012

Spiderman Spiderman, wears a mask and ... jumps off my furniture

Oh dear, it's been 2 years but it looks like Lightning McQueen (from Disney Pixar Movie 'Cars') is no longer the biggest idol in our house. Make way for the Super heroes!
.
T-shirts, Wellies & backpacks are slowly but surely evolving and mutating from images of Cars with eyes to a certain red/blue suited web slinger and his friends! And while he still loves anything with wheels & will always be a petrol head more and more of his games seem to include wrestling his sister and jumping from the furniture to shouts of "Spiderman!" ... often followed by long explanations from me explaining that Spiderman is a goodie and doesn't intentionally hurt anyone or damage property.
.
Ultimately this has lead to requests for a Spiderman birthday party and a Spiderman dress-up costume for said Birthday - unfortunately his Birthday isn't till November, but trying to be the ever-prepared-mother that i am, I started Pinning Spiderman Party ideas and came across THESE simple but soo cute super hero mask templates by Jessica over at Cutesy Crafts and I decided to make the Spiderman mask as my weekend project, I ended up made 2 so he can play with a friend or his sister :D


Wednesday, 13 June 2012

Jubilee Birthday Party!

Little lady turned 2 at the start of the month and despite having originally planned a Minnie Mouse Party I couldn't resist changing the 'family' leg of her celebrations into a Jubilee/Britannia party, fitting for the patriotic climate of the weekend.
.
"So, the Minnie Mouse Party idea went out of the window?" I hear you ask. No, of course not. We ended up hold the jubilee party on the Saturday, having visitors over Sunday, Zoo on Monday and then a Minnie Mouse Party for her friends on Wednesday.
.
OK, so I admit, with a month to the wedding, twelve cards to do and two kids to run after, I probably didn't need to make more work for myself - but sleep is for the weak ... idle hands ... and all that!

An easy idea we've used for a few kids parties are these simple iced sugar cookies. Basically: simple round biscuits, topped with white sugar paste, and finished off with sugar paper 'cake' toppers. You can buy sheets of them in all sorts of themes very cheaply from places like eBay or you can print your own using edible inks.
.

I decided attempt a seemly fitting 'Crown' cake for the occasion. I was inspired by an article from Daily Mail on line. But adapted it to fit our red, white & blue theme, and added more children's party friendly confectionery decorations.


Considering the reduced time frame I don't think it came out too badly. Lots of compliments on the taste too (just a basic 5 egg recipe, filled with buttercream and jam).


As well as the cookies and cake, I made red-velvet cupcakes (topped with candy striped red/white/blue icing and sugar paste cameos), sausage rolls, and my Mum made scones. To finish the look we hung store-bought bunting all over the ceiling and along the sides, union jack paper plate, napkins, even red white and blue straws.
Considering the late notice of the theme change I don't think we did too bad. Given more time and supplies I would have liked to have made paper pomanders, made our own bunting, made solider cookies (or at least got them into the theme somewhere).

Friday, 1 June 2012

Belated "Happy Birthday Mr S" Post

Between planning two birthday , countless birthday cards and wedding crafting (only 5 weeks to go) my blog writing has been suffering - and certainly not down to lack of material. There is so much to do I have found little time to write anything down about what I've been up to, but as I've got a few minutes I'll try to whizz through some updates.

Several weeks ago it was Mr S's birthday, and as my Mint Chocolate Cupcake recipe is his favourite I decided to make an XL version as a surprise. It took forever to get him out of the house so I could make it, he them came home early and my son met him at the door shouting "Daddy, we made you cake!" lol, it went down rather well.


Tuesday, 24 April 2012

Homemade Minnie Mouse Crayons

Another post covering the prep for my daughter's Minnie Mouse Party, this time a gift for the loot bags! Variations of this idea are all over Pinterest, but I've tried to put my own spin on it.

I used a Mickey Mouse Shaped ice cube tray, and only took crayons in my theme colours of white, pink and black (for Minnie mouse) - but this will work with any shape or colour themes.

Monday, 23 April 2012

Character cakes revisited

I've been excitedly trying to work out which kind of cake to make for my daughter's 2nd Birthday. I  have to admit I do love a good character cake. I remember many happy hours spent with my Mum's 'Children's Party Cake Book' (by Cathy Mackinlay, circa 1987), just looking at the photos :D ... Oh and one instance where, without access to sugar paste, I attempted to ice the cake on p55 with peanut butter - which didn't go down well with my parents, who had no idea I'd even made a cake in the first place.

Anyway, it's all got me a bit nostalgic, finger painting, baking gingerbread men and themed birthday cakes were all desirable draws of Motherhood as far as I was concerned when I was a kid - so you can imagine how excited I was when my son's first birthday came along...

Iggle Piggle from 'In the Night Garden' was the hero of the moment during JJ's first year of life, so who else could I base a cake on. I'd planned out the shape, and even made a template to cut each limb out of a 9 by 9 cake tin. This was a learning curve about sugarpaste, buying plain white then colouring it with food dye was a slow and unrewarding process, but I learnt a lot (even if it was simply: do not use food colouring).
By JJ's second birthday, everything had to be Pixar Cars related (and still is a year and a half later), he even got a red race car shaped bed. I wish I'd known then how much of an obsession cars where going to be for him and I'd have invested in a car shaped tin, instead for this cake I layered two large square cakes and then carved the cake out of them (there was so much cut-off Mr S even made an additional 'mater' cake and iced it with butter cream). This time I bought pre-coloured red icing :)

Third Birthday, Josh was still equally cars obsessed and personally requested a 'Chick Hicks' cake (another Pixar/Disney cars character), this is probably my best cake to date, having perfected my 'car shaped' cake the year before.

My daughter's first birthday I set myself a bit of a challenge with this 'Waybuloo' De-Lei cake, when the big day came around I was feeling so under the weather with flu but managed to cobble together this cake for her. Can't wait for this year, its a Minnie Mouse theme and there are so many great ideas out there.

Saturday, 17 March 2012

Invites: Minnie Mouse Theme Tutorial

My little girl's 2nd birthday is coming up and I'm planning a Minnie Mouse Party, but hoping to do as much of it myself and avoid the commercial partywear as much as possible, so keep your eyes peeled for a party special. But first I need to send out the invites, they're so simple to make I thought I'd share a quick tutorial on them for all you crafty parents out there - in fact this one is so simple older children will be able to help too.
* Friends and family please spot the 'deliberate mistake' with the date on this first batch of invites, lol

What you will need:
 White A4 paper
Black Card
Pink dotty ribbon
Scissors
A circle cutter (optional)
Adhesive (eg- high tack tape)
5"x5" Envelopes
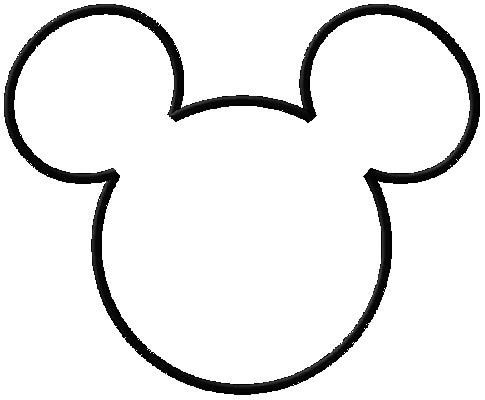
The below template (click to get original size)


Firstly print the mickey mouse template (click on image to get original size and then save or copy and paste into word). Then on a new word document use the 'insert shape' tool to draw 6cm circles and the text box tool to add your party information and print. I can recommend the fun Disney style font Walter. Alternatively, cut 6cm circles with your cutter and write the information by hand.
Next use your circle cutter to cut out the party information panel. Cut out your mickey mouse outline, and use a pencil to draw around it as many times as will fit on each piece of black card (I think I managed 4 per A4) alternatively use your circle cutter to make one large and two small circles and overlap slightly.
Now take a length of ribbon and tie into a bow (I ended up getting them to the right size and then adding a single stitch to hold them in place but this isn't essential). Now simply take your three elements and stick together, I used a high tack tape roller mouse to attach the information panel and glue dots to attach the bow. Now just repeat the process as many times as required.

[For the full party details CLICK HERE]